Auto Otamatone
The Finished Project
Quick Bullets
In this project my teammates and I:
Conceptualized a project for automated playing of the toy fretless instrument called the Otamatone.
Developed a Stepper Motor and Servo driver on an FPGA using Verilog to move the playhead when keyboard keys were pressed.
Interfaced C firmware with drivers using Memory Mapped I/O to rotate the motor and activate the servo.
Collaborated closely with two teammates to establish requirements for the chassis and other hardware and to keep the project on schedule.
Designed circuitry to analyze the electrical signal frequency of the Otamatone using Op-Amps, which helped enable self-tuning functionality.
Created a novel P-controller to automatically tune the instrument using GPIO interrupt handlers written in C.
Wrote additional interrupt handlers in C to process UART signals from a Raspberry PI connected to a USB MIDI keyboard.
Under Construction Videos
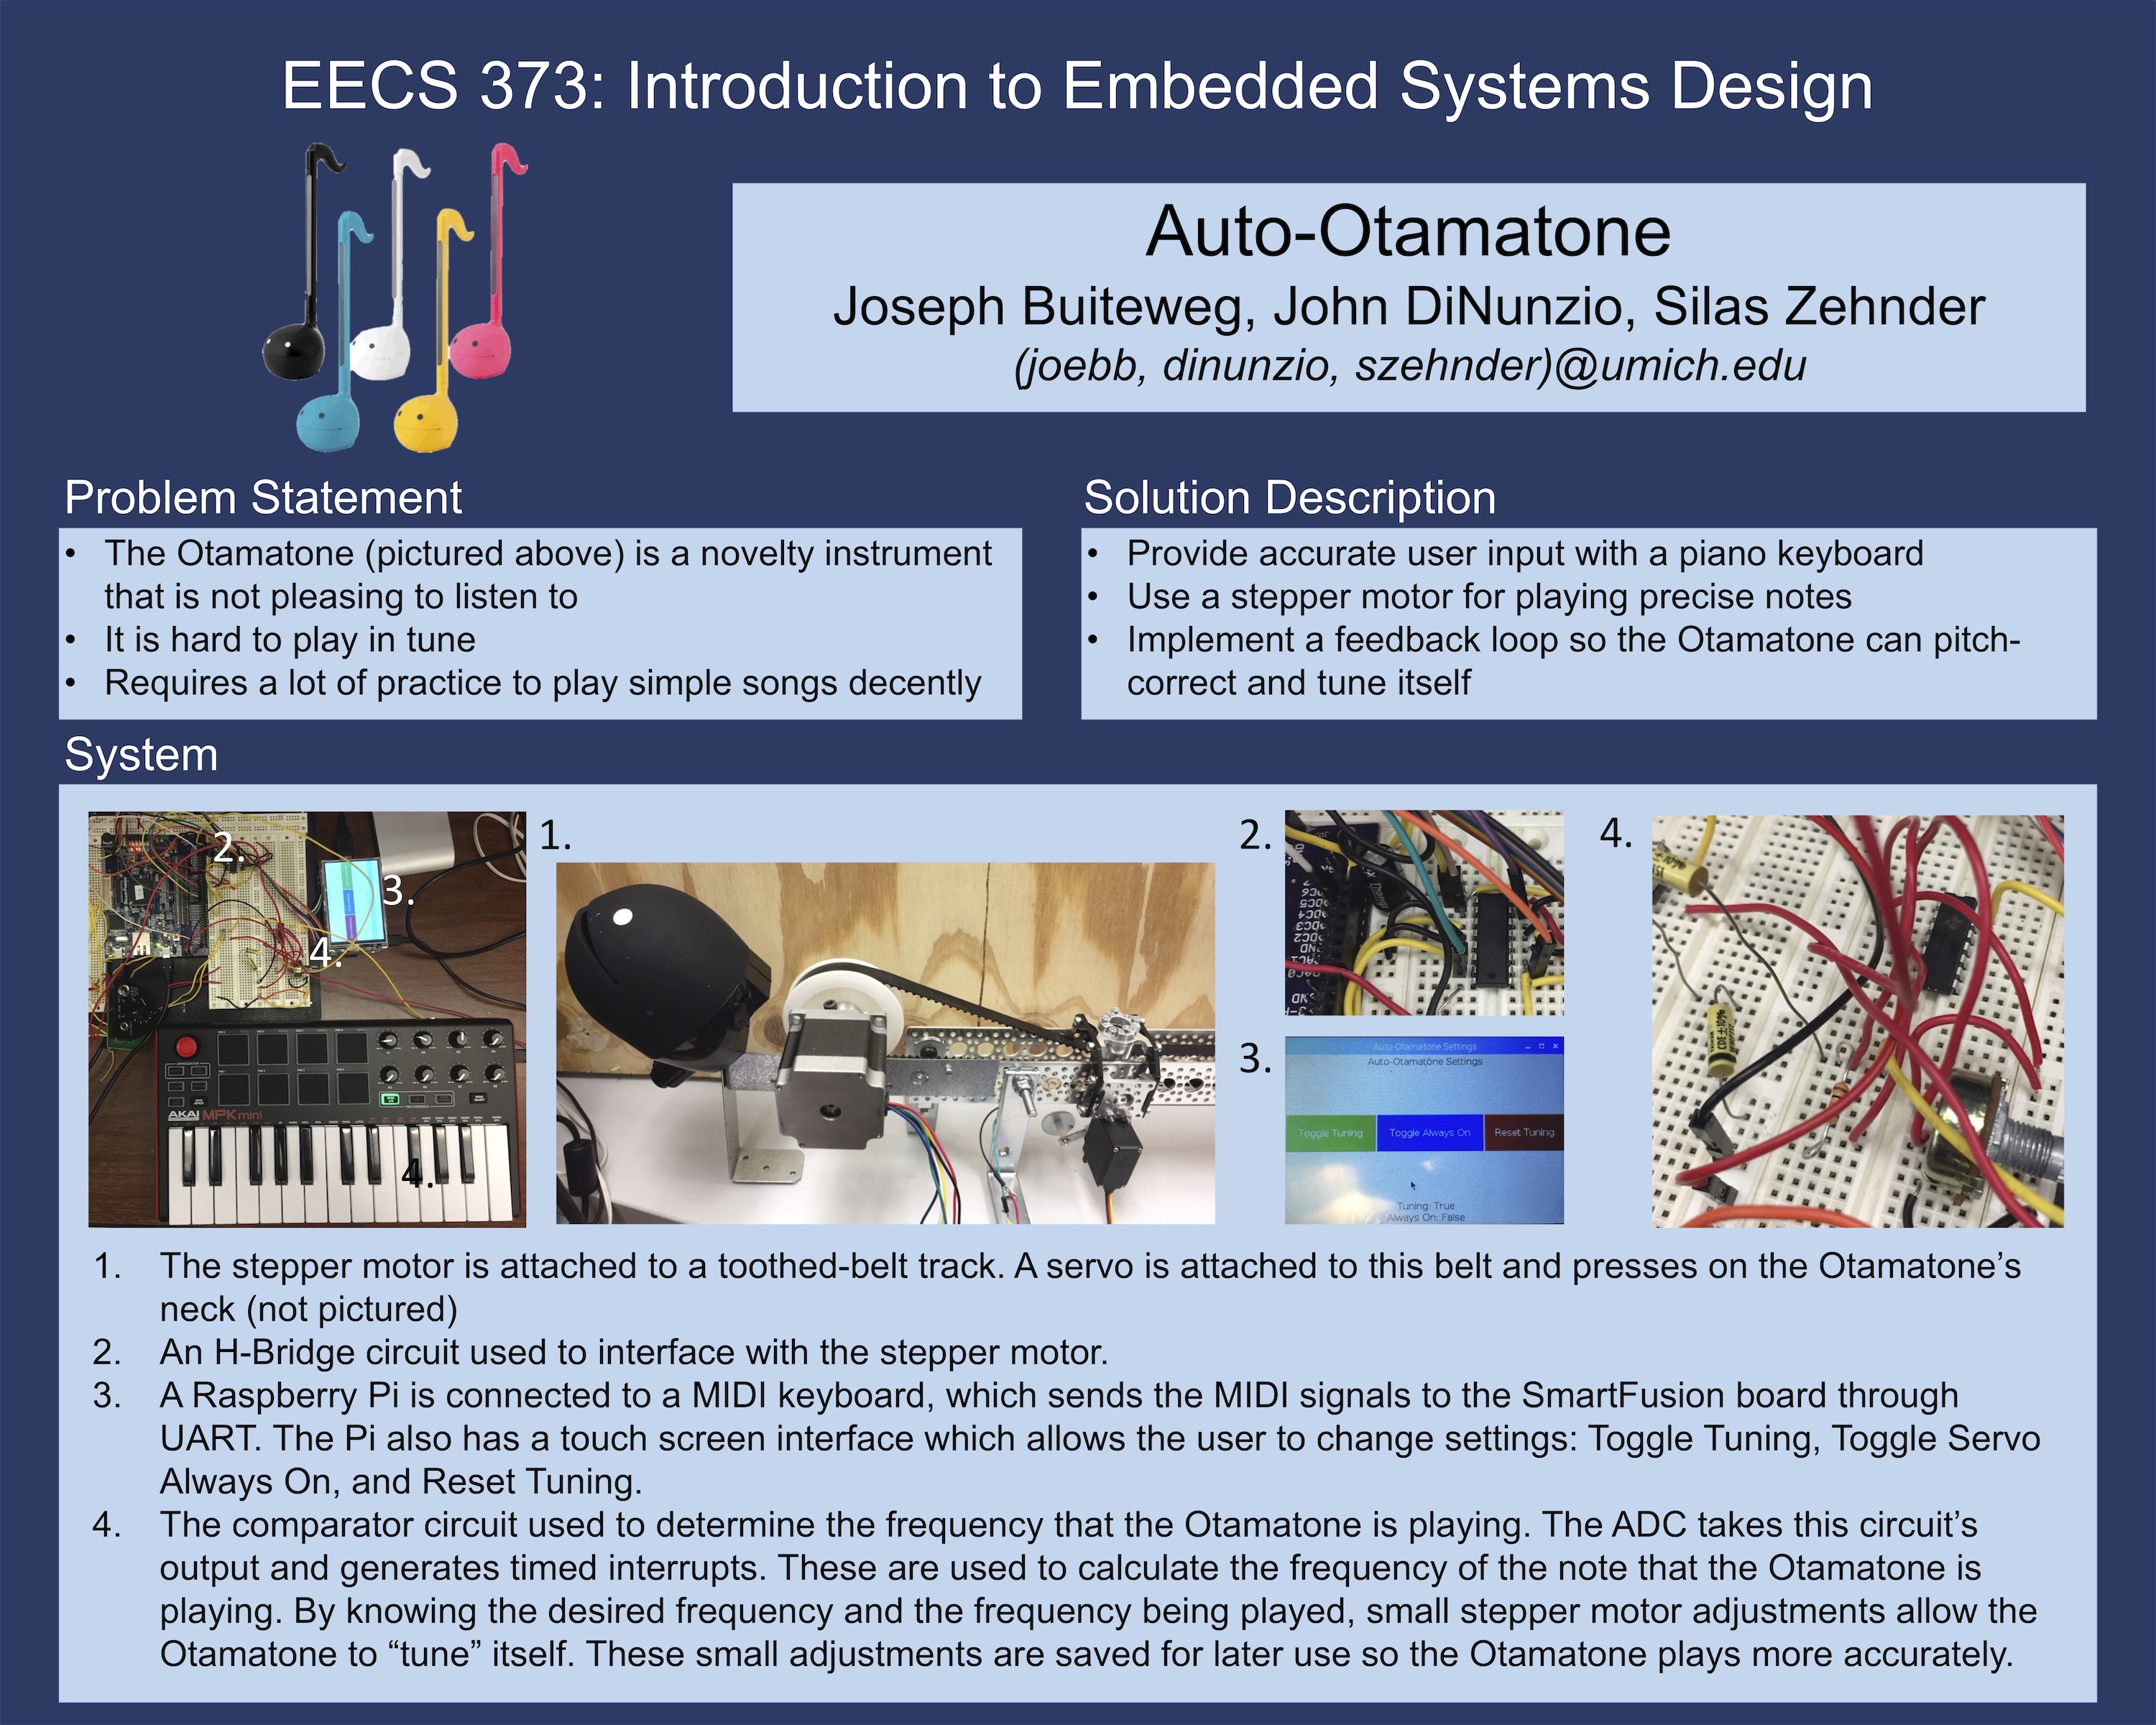
Project Poster
Hardware Utilized
- Microsemi's SmartFusion SoC
- SN754410 H-Bridge
- Raspberry Pi 3
- A voltage comparator from Texas Instruments.
- Hitech HS-422 Servo
- Nema 23 Hybrid Stepper Motor
- Otamatone Deluxe
- Akai MPK Mini
Reflections
This project could’ve been improved in a couple of ways:
A majority of our time for the project was spent getting the stepper motor working by flipping inputs to an H-bridge from an FPGA, which ended up being ~300 lines of Verilog. If you’ve written HDL before, you know that it takes forever to debug. We thought it would be crucial to implement this driver in hardware since we wanted the playhead to move as fast as possible. Whether this mattered or not I don’t know, but we could’ve saved a bunch of time using a premade stepper motor driver such as the A4988 (a slew of other drivers can be found in this blog post).
We should’ve used a motor encoder to monitor how much the playhead actually moved along the track. We simply assumed that whenever we told the stepper to take 1 step, that it actually took that step, which doesn’t always happen in reality.
The motor would somtimes get snagged on the track and take less than a full step (especially when making small adjustments for self-tuning), which would then cause the state of our software to drift out of sync with where the playhead actually was.
This was especially problematic because the self-tuning mechanism updated the internal step count of our firmware. Because of this, we had to restart the whole system a few times on demo-day, which was quite unfortunate. This behavior can be seen in the fourth video from the playlist linked above.
In addition to a motor encoder, a full on PID controller would’ve yielded much better results when self-tuning. Our only insight into the performance of the system was the frequency that the Otamatone was playing compared with the correct frequency of the key pressed on the MIDI keyboard. This difference in frequency is the perfect input for a PID controller, with the position of the playhead being the output. Unfortunately, we just didn’t have the time to implement one in software like we did with the P-controller. Adding the actual state of the motor to our feedback loop using an encoder also would’ve helped immensely.
I don’t remember whether we used the Nema 23 in unipolar or bipolar mode, but bipolar stepper motors provide more torque than their unipolar counterpart, which could’ve let us eke out some more RPMs from the motor. The downside to bipolar mode is that is harder to operate, which isn’t ideal for a project with a short timeline like ours.
(Apologies for the console errors on this page and other pages with embedded youtube videos, it seems youtube needs to fix their CORS policies and disable doubleclick ads when embedding youtube-nocookie.com links)